

This article walks through how to manage an active Agile EP subscription. Whether you’re expanding your team or adding a new product, the steps are straightforward once you know where to go.
Depending on what you need to do, you may:
- Add a new product
- Change the number of seats on a subscription
- Change your billing period
- Cancel a subscription
Most subscription changes begin in Manage > Subscriptions, but there are two exceptions.
- Adding a brand-new or additional product is done in the Store, and there is a link to it at the bottom of the Subscriptions page. See this article for details.
- Giving a specific person access to a subscription is done in Manage Access. See this article for details.
How Subscriptions Work in Agile EP
A few quick principles make everything easier:
- Each product (for example, WA Only or Multi-State) has its own subscription.
- Each subscription has its own seat count.
- Access is granted per subscription, so a user assigned to one product does not automatically have another.
- Adding a new product is done from the Store, not from Subscriptions.
- Your client data stays in Agile EP and is not tied to a specific product.
All paid subscriptions will automatically renew unless you cancel your subscription. You will receive a notification by email one week before the date of renewal prompting you to make any necessary changes.
Where to Make Each Change
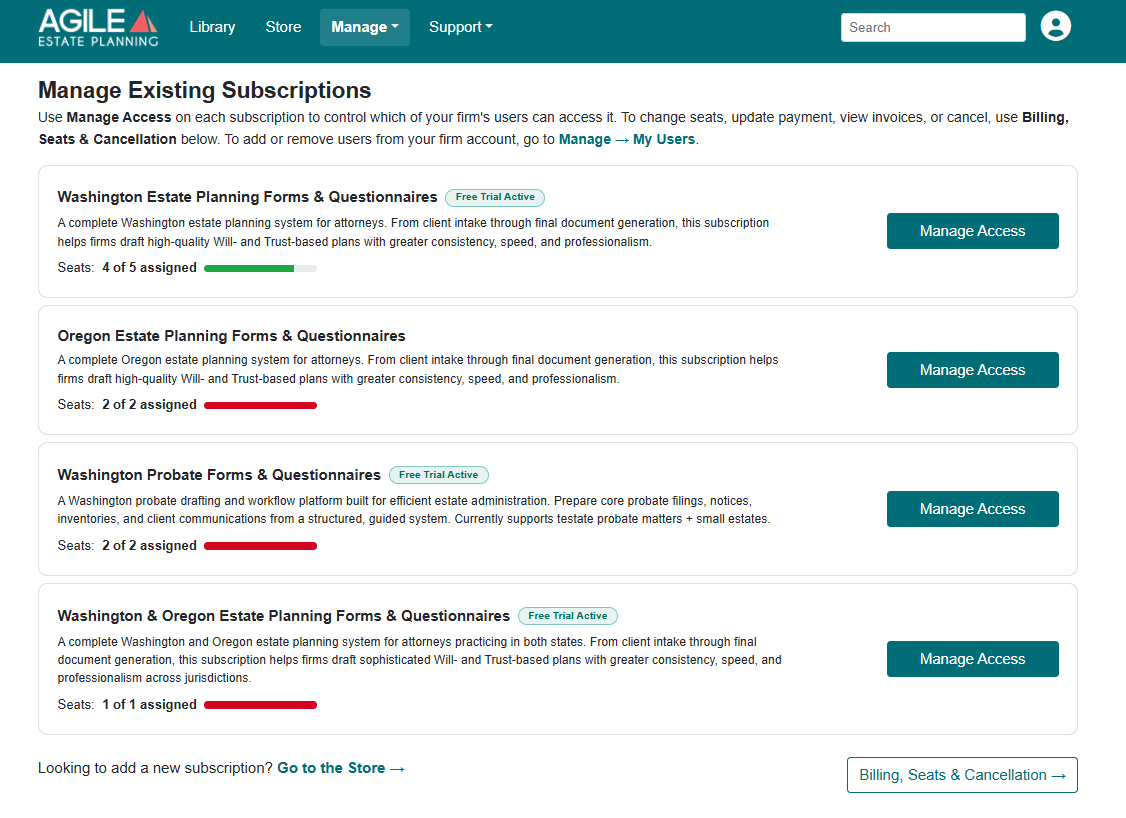
The page is titled Manage Existing Subscriptions and lists the subscriptions your firm holds, one card each, showing the seats assigned out of the seats you are paying for. A subscription still inside its trial period carries a Free Trial Active badge.
From there:
- Manage Access on a card gives a person access to that subscription, or takes it away.
- Billing, Seats & Cancellation at the bottom of the page opens your billing portal, where you change the seat count, update your card, download invoices, and cancel.
You cannot move a subscription from one product to another
There is no switch. Changing product means cancelling the subscription you have and subscribing to the one you want in the Store, as two separate actions in that order. This comes up most often when a firm holds a single-state Estate Planning subscription and wants to draft in both states, which requires Multi-State Estate Planning. Cancelling does not delete your client matters. See this article for additional details.
Managing an Existing Subscription
To change your seat count or billing period, go to: Manage > Subscriptions, then click Billing, Seats & Cancellation.
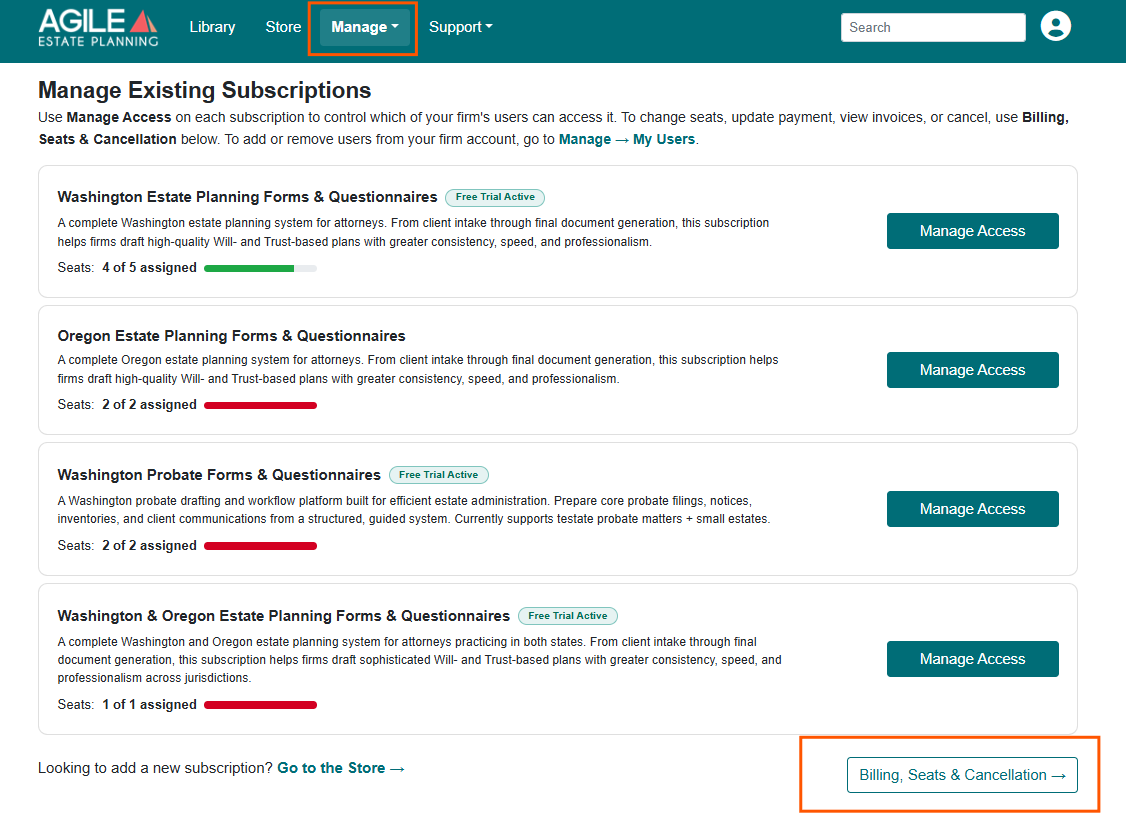
This opens the billing portal. Select the subscription you want to update.
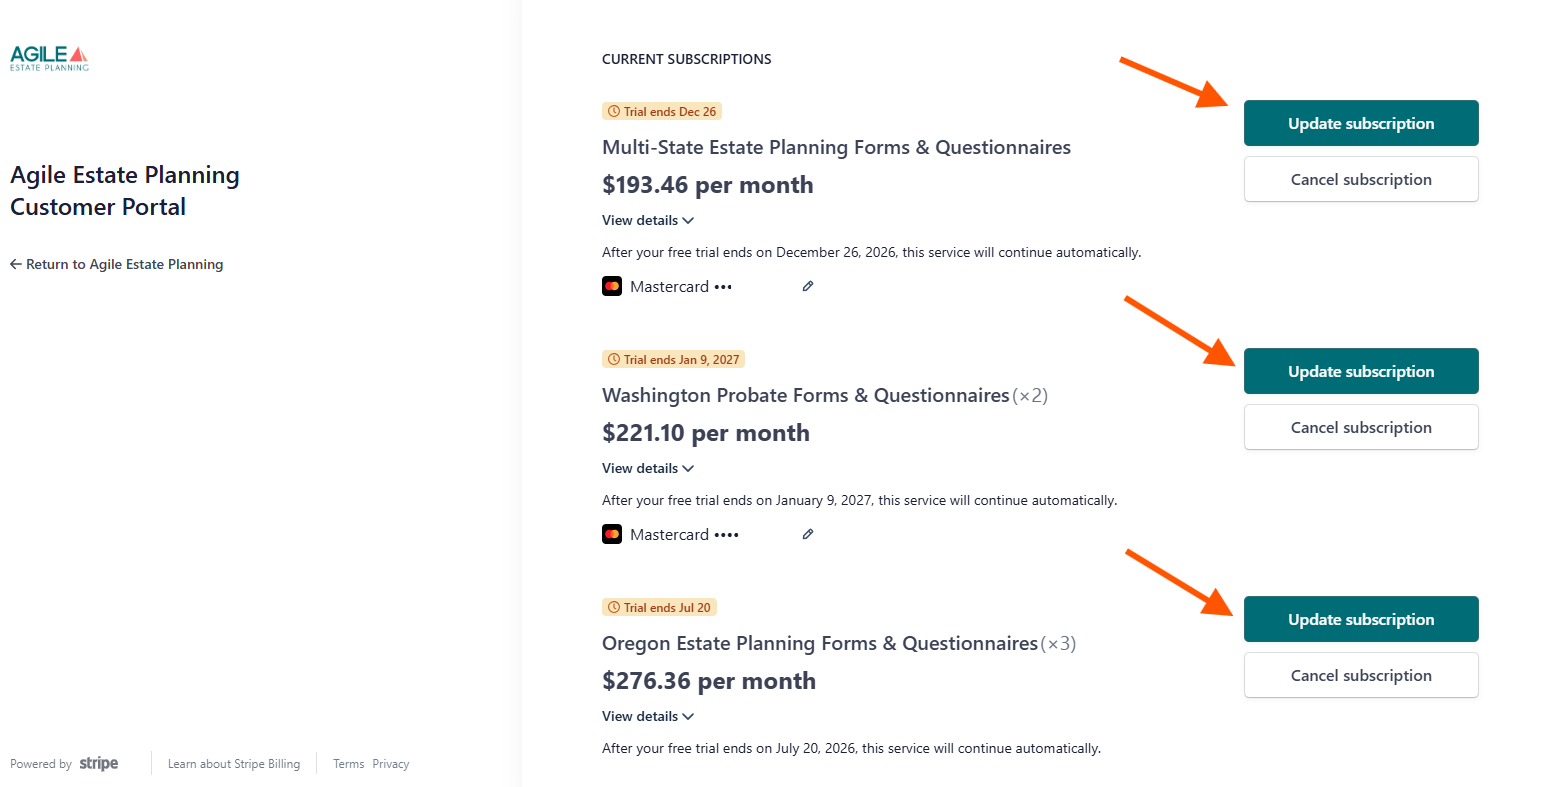
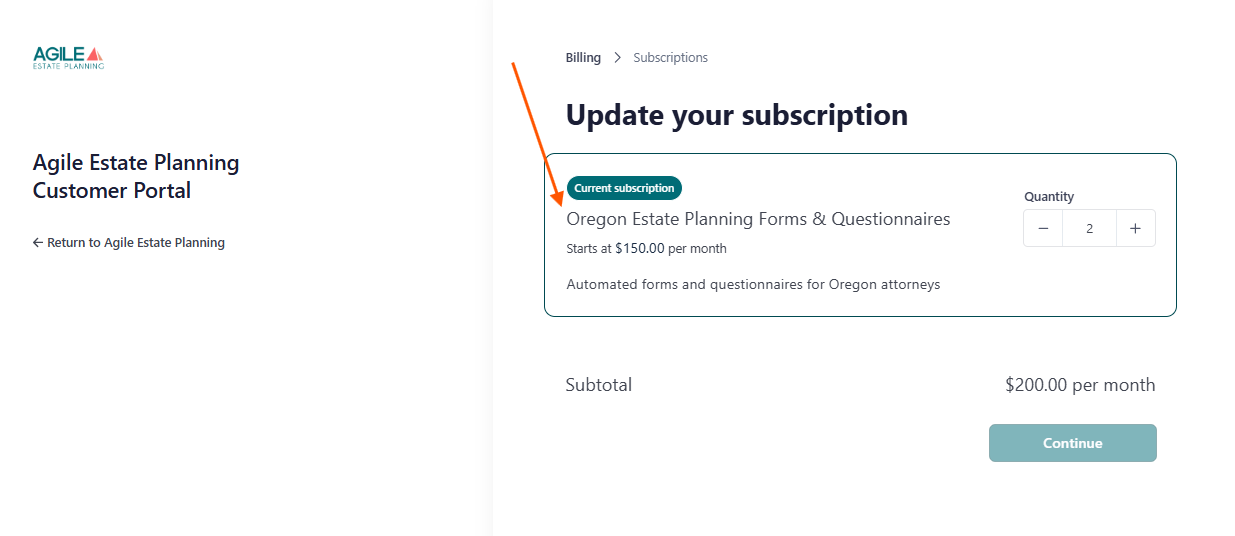
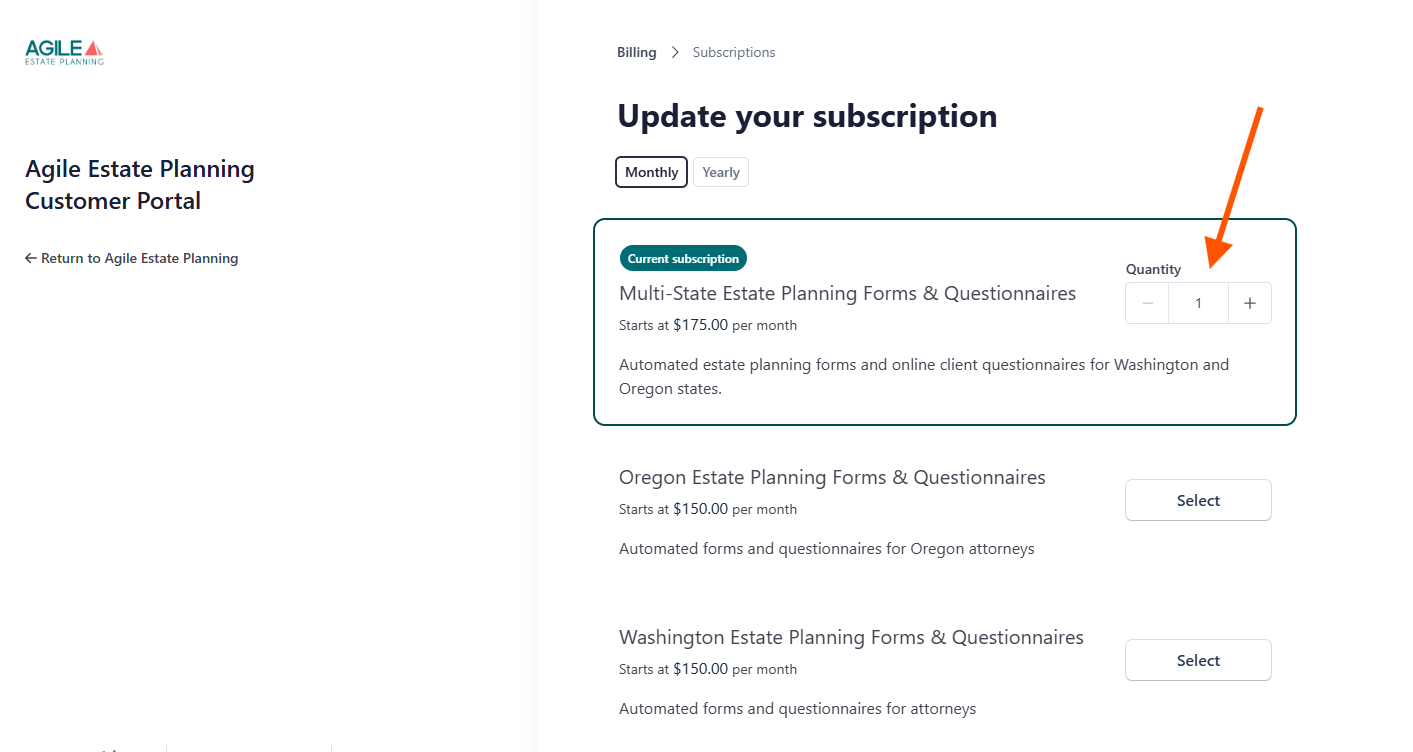
You will be taken to the Update your subscription screen for the product that you’ve chosen to update.
Changing the Number of Seats
If you want to increase or reduce the number of people who can use a product you already subscribe to.
Go to Manage > Subscriptions, click Billing, Seats & Cancellation, and select the subscription you want to update.
- In the Current subscription box, adjust the Quantity using the + or - buttons. The number shown is the total seat count (for example, if you need 3 seats in total, set the quantity to 3).
- Follow the prompts to confirm. Billing will automatically adjust based on the updated seat count, your billing period, and any applicable proration.
- Once confirmed, assign the subscription to the additional users inside Agile EP.
Two ways to add a seat
You can raise the seat count in the billing portal first and then assign someone, or you can assign someone to a full subscription and confirm the added seat when prompted. Both arrive in the same place. See this article for details.
Changing Your Billing Period (Monthly or Yearly)
If you want to switch between Monthly and Yearly billing.
Go to Manage > Subscriptions, click Billing, Seats & Cancellation, and select the subscription you want to update.
At the top of the page, use the toggle to select Monthly or Yearly, then follow the prompts to confirm.
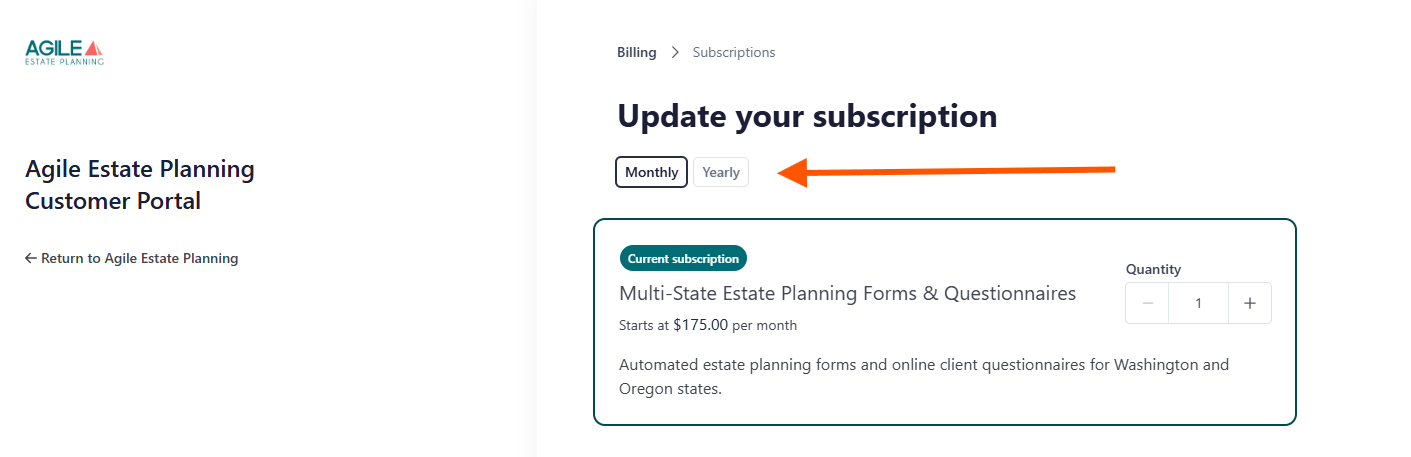
Your billing schedule will update based on the selected billing period and any applicable proration.